Reverse Sear Chicken Breast Recipe
Wondering how to achieve juicy, succulent chicken? My method for reverse sear chicken breast creates a delightful flavor that’s sure to impress your family!

Oh my gosh, let me tell you about the first time i tried cooking chicken breast using the reverse sear technique .
I was super excited to finally make a juicy chicken that didn’t end up smelling like shoe leather. you know how it goes—you’re all set to impress your friends with an amazing dinner, and then bam! you cut into that chicken, and it’s drier than the sahara.
Talk about a hit to your culinary confidence! so, i decided to dive into the world of reverse sear chicken , and let me tell you, it was like discovering a whole new level of deliciousness!
This method, which actually started with steak cooking, has made its way into the chicken game, and i’m here for it.
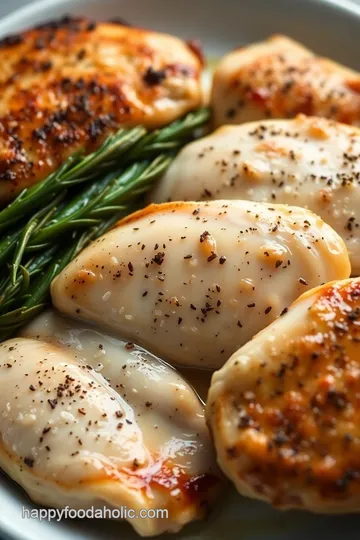
It’s not just about the crispy chicken exterior ; it’s about that mouthwatering, moist inside that makes every bite feel like a cozy hug.
If you’re tired of bland, dry chicken and are ready to bring some life back to your dinner table, keep reading!
Recipe Overview
The reverse sear technique isn’t just a new trend; it brings a whole new meaning to succulent chicken cooking . originally hailing from the steakhouses, this method has taken over our home kitchens, and i couldn’t be happier.
Why? because it’s all about making sure perfectly cooked chicken—no guessing game involved!
Now, when it comes to timing, you’re looking at around an hour and fifteen minutes from start to finish. this includes 15 minutes of active prep and about 30 minutes of resting .
I know, it sounds like a bit more effort, but trust me, it’s worth the wait. the beauty of this method is that it’s easy chicken dinner bliss, with just a medium difficulty to tackle.
Worried about costs? fear not! this chicken recipe is budget-friendly and yields enough to serve four people. with just a few everyday ingredients, you’ll have a flavorful meal that won’t break the bank.
Key Benefits
Let’s talk about the health benefits and nutritional highlights . chicken breast is a lean source of protein, which is fantastic for anyone looking to eat healthier.
Plus, the reverse sear method keeps the chicken juicy while allowing for endless chicken breast seasoning ideas . from garlic powder to fresh herbs, you can really jazz it up.
And let’s not forget the unique selling point—while many might just throw chicken in the oven or grill it, the reverse sear brings out flavor in a way that’s just, well, next level! seriously, it’s perfect for special occasions.
Picture this: you’ve got a fancy dinner party, and you serve up this beautifully seared chicken with some fancy sides.
Your guests will be raving about your culinary prowess!
Moreover, this versatile technique opens up a world of chicken breast variations . you can mix it up with your favorite marinades or sauces.
And who doesn’t love a good pan sauce drizzled over that juicy chicken? pair it with roasted veggies or a simple garden salad, and you’ve got a family-friendly dinner anyone would enjoy.
Now that i’ve got your taste buds tingling, let’s dive into the ingredient list for this incredible reverse sear chicken breast .
Trust me, you won't want to miss out on this one!
Essential Ingredients Guide
If you wanna whip up an amazing meal, understanding the essential ingredients is key! Let’s dive into the premium core components that can make your dishes sing.
Premium Core Components
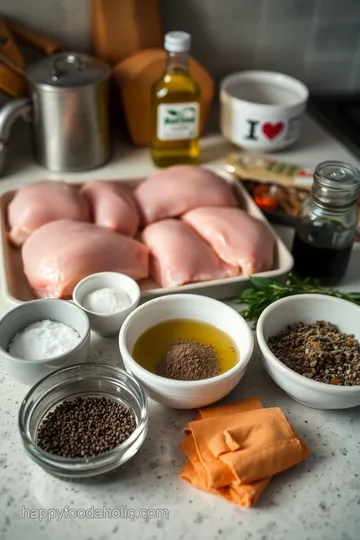
First off, here are some detailed measurements that’ll make your life easier. for our chicken breast recipe, you’ll need 4 boneless, skinless chicken breasts (about 6 oz or 170 g each ).
But hey, if you're using metrics, trust me, the scales will work wonders!
Now, let’s talk quality. When choosing chicken, look for a nice pink color and that fresh, meaty smell. If it smells funky, skip it!
Storage guidelines? keep that chicken in the fridge for up to 2 days before cooking or freeze it for longer.
Just make sure you label it, so you don’t forget what you’ve got stashed away!
A quick freshness tip: For the best succulent chicken cooking , heat it up to 165° F ( 74° C) . And remember, that resting chicken meat is crucial for juiciness!
Signature Seasoning Blend
Now, let’s spice things up! The signature seasoning blend is vital for nailing that juicy chicken breast recipe . A simple mix of kosher salt, black pepper, garlic powder, and dried thyme will take you places!
If you’re feeling fancy, try pairing herbs like rosemary or even go bold with some smoked paprika . And remember, the magic is in the balance—mix and match them for those savory chicken flavors !
As for regional variations , don’t be shy! Italian seasoning or a dash of Cajun spices can give your chicken a kick from across the world.
Smart Substitutions
Oftentimes, you might run out of a specific ingredient and that’s okay! here are some common alternatives . if you don’t have chicken breasts, chicken thighs work well—just adjust the cooking time since they take a bit longer.
For dietary modifications , if you’re watching that sodium intake, try reducing the kosher salt in your seasoning. And if you’re in an emergency, a splash of soy sauce can turn up the flavor even if you lack broth!
When the seasons change, so can your options. Use fresh herbs in the summer or dried ones in the winter. Flexibility is your friend!
Kitchen Equipment Essentials
Alrighty, let’s not forget the right tools. Must-have tools include a cast-iron skillet , an oven, and, seriously, don’t skip the meat thermometer—it’ll help you cook chicken perfectly !
If you don’t have a cast-iron pan, a regular skillet works just fine. But, if you want that crispy chicken exterior , nothing beats the cast-iron, trust me!
Preparation tips? Always prep your ingredients before cooking. It sounds basic, but having everything in reach speeds up the process and makes cooking more enjoyable! And for storage solutions, don’t let leftovers sit in a grimy container—use glass ones instead, fantastically easy to clean!
Alright, you guys, now that we’ve laid out all the essentials, it’s time to tackle the delicious part of this journey.
Are you ready to learn how to create the ultimate reverse sear chicken breast ? i promise, this method gives you that juicy perfection in every bite —let’s get cooking!
Unlocking the Secret to Professional Cooking: Reverse Sear Chicken Breast
If you're like me, you probably crave that juicy chicken breast with a crispy exterior. you know, the kind that makes your mouth water just thinking about it? well, i’m here to let you in on a culinary gem: the reverse sear chicken breast technique.
It’s not just a fancy term; it’s a game-changer for home cooks. this method not only locks in flavor but also makes your chicken perfectly cooked every time.
So, let’s get into it!
Essential Preparation Steps
First things first, before you even turn on the oven, you need to prep for success. if you wanna nail this recipe, you’ve gotta embrace mise en place —fancy french for “everything in its place.
” that means measuring out your ingredients and having them ready. this makes a world of difference, trust me!
Next up? time management tips. set aside about 15 minutes for prep . it’ll make the cooking part so much smoother.
You'll be more like a chef and less like a frantic cook!
Then, let's talk organization; keeping your workspace clean can prevent accidents. Don’t be that person who trips over a measuring cup while trying to get to the oven!
And please don’t forget safety. The last thing you want is a wandering kitchen spoon or a slippery floor. Keep your area tidy and watch your step.
Step-by-Step Process
Ready to get cooking? Let's break this down into clear, numbered steps:
-
Prep the Chicken: Pat those chicken breasts dry and season them generously with kosher salt, black pepper, garlic powder, and dried thyme . This flavorful herb-seasoned chicken is the secret to deliciousness!
-
Preheat the Oven: Set that oven to 275° F ( 135° C) . Low and slow is the name of the game here.
-
Bake the chicken: lay those perfectly seasoned chicky pieces on a baking sheet. you're aiming for an internal temperature of 150° f ( 65° c) , which should take around 25- 30 minutes .
Don’t forget to check with a meat thermometer; it’s your best friend in the kitchen!
-
Sear the chicken: heat some olive oil in a cast-iron skillet over high heat. once it’s shimmering, toss in your chicken and sear each side for 2- 3 minutes until gold and crispy! make sure it reaches that magical 165° f ( 74° c) before it’s considered done.
-
Rest the chicken: once removed from the skillet, let it rest for about 5 minutes . this is crucial for juicy results! trust me, you don’t want to be cutting into your chicken right away.
-
Optional sauce: if you’re feeling fancy, whip up a quick pan sauce with chicken broth and a bit of lemon juice to drizzle over your chicken.
It elevates that already succulent chicken cooking!
-
Serve: Slice it up, add that sauce, and garnish with fresh herbs if you like.
Expert Techniques
Now, let’s chat expert techniques. Keep an eye on your critical steps —timing and temperature are everything.
One common mistake? Not using a meat thermometer. That gadget will save you from overcooking your chicken. Nobody likes dry, sad, chewy chicken!
If you ever find your chicken wasn’t as crispy as you’d hoped, here’s a troubleshooting tip: make sure you’re not crowding your pan while searing.
Give each breast space to breathe for that irresistible crispy chicken exterior!
Success Strategies
Last but certainly not least, let’s talk about success strategies.
First, avoid cooking straight from the fridge. Letting your chicken come to room temperature for about 30 minutes helps with even cooking.
Quality assurance is key. always check for that 165° f ( 74° c) mark for perfectly cooked chicken! and if you want to be ultra-prepared, make-ahead options abound.
Prep everything earlier in the day and save your cook time for that evening’s easy chicken dinner.
Honestly, cooking can feel overwhelming sometimes, but recipes like this one make it a smooth process. You’ll be whipping up flavorful chicken dishes in no time like a pro!
Now that you're ready to impress your guests, let's wrap things up with some additional information on what makes this reverse sear chicken breast the perfect choice for your quick dinner ideas.
Additional Recipe Information
Pro Tips & Secrets
Oh man, i can’t stress enough the power of a meat thermometer . it’s a game-changer when you're trying to cook chicken perfectly.
For reverse sear chicken breast , you're aiming for a cozy 165° f ( 74° c) at the end. this magic little tool will help you avoid that dreaded dry, rubbery chicken that makes you want to cry.
Trust me, i've been there.
Now, let’s chat time-saving techniques. if you’re short on time, marinate your chicken the night before. throw some olive oil, garlic, and herbs in a bag with the chicken, and it’ll soak up those flavors like a champ before you even hit the kitchen.
Perfect for that easy chicken dinner vibe.
Want to kick the flavors up a notch? try adding a bit of lemon zest or a splash of balsamic vinegar to your seasoning mix.
It works wonders. and don’t forget about presentation! a sprinkle of fresh herbs on top not only looks fancy but also enhances those savory chicken flavors .
Plate it just right, and suddenly you’re a top chef in your own kitchen.
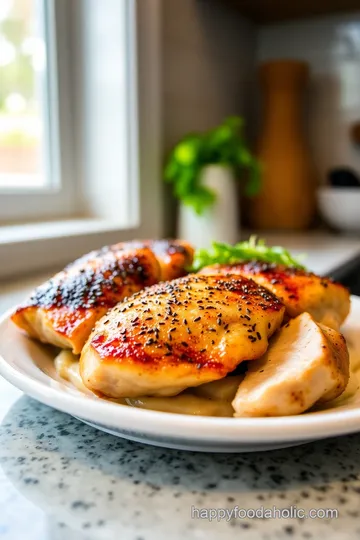
Perfect Presentation
Presentation matters, especially when it comes to oven-baked chicken breasts that you want to impress with. use a large plate and slice your reverse sear chicken breast diagonally.
It’s like cutting the chicken into little, juicy strips that just scream for attention.
Garnish? yes, please! think fresh parsley or thyme. or go wild and add some cherry tomatoes for a pop of color.
Color combos can make or break your dish. a bright green salad beside your golden chicken will not only make it look more appealing but also add a fresh crunch.
Visual appeal is key, so don’t skimp on the aesthetics!
Storage & Make-Ahead
If you’ve got leftovers (if!), make sure to store them right. just pop the chicken in an airtight container, and it’ll be good for about 3-4 days in the fridge.
Got more time? freeze it! just ensure you wrap it properly. leftover chicken can make for some savory chicken dishes later on, like chicken salad or sandwiches.
To reheat, I suggest the oven or an air fryer for that crispy exterior. Microwaving can make it dry, and nobody wants that. Just reheat gently until warmed through.
Creative Variations
Now, here’s where it gets fun! the reverse sear chicken breast is a solid base, but you can play around.
Why not try a buffalo sauce for a spicy kick? or maybe a honey mustard glaze if you’re leaning towards sweet.
If you’re going for seasonal flavors, think about using herbs that match the time of year. fresh basil and tomatoes scream summer, while rosemary and garlic are cozy winter staples.
Want to cater to dietary needs? swap for chicken thighs — they’re more forgiving, and you’ll still get those juicy flavors.
Whatever you choose, make that chicken breast variation count!
Complete Nutrition Guide
Alright, here’s the scoop on nutrition. a serving of our juicy chicken breast recipe comes in at about 280 calories , with a hefty 40g protein .
Perfect for that post-workout meal! plus, it’s low-carb, so you’re good on that front too.
If you’re counting macros, remember that chicken breasts are lean, helping you stay on track. pair it with some veggies for added fiber.
You’re looking at a well-rounded meal that won’t make your waistband scream.
Expert FAQ Solutions
Got questions? we’ve all been there. here are some quick answers to common queries. if your chicken breast cooking methods don’t include resting after cooking, you’re missing out! let it chill for at least 5 minutes .
This helps keep the juices locked in. also, if you ever feel unsure about doneness, remember that the most common chicken cooking times indicate it should take about 30 minutes in the oven depending on thickness.
If you want to experiment with flavors, go wild with your chicken breast seasoning ideas . Throw in whatever herbs and spices you have on hand.
Wrapping It Up
Now that you’re armed with all this wisdom, grab those chicken breasts and get cooking! there’s something incredibly satisfying about mastering the reverse sear chicken breast technique.
Once you nail it, you’ll feel like a kitchen superstar! enjoy those juicy bites! happy cooking, friends!
Reverse Sear Chicken Breast Recipe Card

⚖️ Ingredients:
- 4 boneless, skinless chicken breasts (about 6 oz / 170 g each)
- 2 tablespoons olive oil
- 1 teaspoon kosher salt
- 1 teaspoon black pepper
- 1 teaspoon garlic powder
- 1 teaspoon dried thyme or rosemary
- 1 cup chicken broth (for optional pan sauce)
- 1 tablespoon unsalted butter (for optional pan sauce)
- 1 tablespoon fresh lemon juice (for optional pan sauce)
- Fresh herbs for garnish (optional)
🥄 Instructions:
- Step 1: Pat chicken breasts dry with paper towels. Season both sides with salt, pepper, garlic powder, and thyme.
- Step 2: Preheat your oven to 275°F (135°C).
- Step 3: Place the chicken breasts on a baking sheet and bake until the internal temperature reaches 150°F (65°C), about 25-30 minutes.
- Step 4: Heat olive oil in a cast-iron skillet over high heat. Add the chicken breasts and sear for 2-3 minutes per side until golden brown and crispy.
- Step 5: Remove from skillet and cover loosely with aluminum foil. Let rest for 5 minutes.
- Step 6: In the same skillet, add chicken broth and fresh lemon juice. Scrape the fond from the bottom, boil to reduce by half, then stir in butter.
- Step 7: Slice the chicken and drizzle with the sauce. Garnish with fresh herbs if desired.
Previous Recipe: How to Make Juicy Perdue Chicken Tenderloins: 5 Ultimate Tips!
Next Recipe: How to Make Ruth Chris Stuffed Chicken Breast: 5 Decadent Tips