Picnic-Perfect Open-Faced Sandwiches
Dreaming of the perfect picnic? Learn how to make open-faced sandwiches that burst with flavor and creativity. Fresh toppings await your touch!

- Deliciously Simple: Why You Should Make Open-Faced Sandwiches for Picnics
- Essential Ingredients Guide: Unlocking Flavor and Freshness!
- Professional Cooking Method: Mastering Open-Faced Sandwiches
- Pro Tips & Secrets: Elevate Your Open-Faced Sandwich Game
- Perfect Presentation: Plating Like a Pro
- Storage & Make-Ahead: Keeping It Fresh
- Creative Variations: Get Adventurous!
- Complete Nutrition Guide: Stay Smart & Savvy
- Expert FAQ Solutions: Your Burning Questions Answered
- Conclusion: Let’s Get To It!
- Recipe Card
Deliciously Simple: Why You Should Make Open-Faced Sandwiches for Picnics
Oh my gosh! what better way to enjoy a sunny day than with some yummy open-faced sandwiches at a picnic? i still remember the first time i whipped up these delightful bites.
I was trying to impress my friends (and maybe my crush, too) at a picnic in the park. as i laid out the ingredients, i thought, "this could be a total flop.
" but let me tell you, my first try at making these sandwiches turned out to be a hit! it was like a flavor explosion, and everyone loved them.
If you’re looking for picnic food ideas that are both delicious and visually stunning, then let’s dive into how you can easily make open-faced sandwiches for picnics .
A Little History on Open-Faced Sandwiches
Did you know that open-faced sandwiches have roots in various culinary traditions from around the world? from the traditional scandinavian smørrebrød to italian bruschetta, these tasty treats have come a long way.
They’ve evolved into a modern-day picnic staple, loved for their versatility. you can dress them up with all sorts of toppings or keep them simple.
How cool is that? folks love them because they just scream casual outdoor dining and they’re super easy to prepare.
In just about 15 minutes or so, you can pull together these sandwiches, which makes them a perfect choice for a quick brunch or lunch.
Even if you decide to roast some veggies or chicken, the total time won’t exceed 25 minutes . plus, they’re easy on the wallet — you can find quality ingredients for a great price, particularly if you shop seasonal.
Why You’ll Love These Sandwiches
Now, let’s chat about the key benefits of these beauties. for one, they can be as healthy as you want! think about it — layering fresh veggies like tomatoes and arugula loans vitamins and nutrients to your meal.
Plus, you can use whole grain bread that not only adds a hearty texture but also brings along all those whole grain bread benefits .
That's a win-win in my book!
The cool thing is, open-faced sandwiches are super customizable. want to impress your guests at a potluck? go gourmet with some sliced roasted chicken and homemade cream cheese spread .
Or if you’re feeling adventurous, play with creative sandwich toppings like spicy hummus or radishes. they’re also great for light lunch options when you’re home alone.
Second helpings? totally acceptable!
These sandwiches are not just for picnics either! they’ve got you covered for brunch, dinner parties, or easy party appetizers.
Seriously, every gathering could be better with a platter of these layered sandwich ideas out. as a pro tip from my own experience, prep the bread with a crunchy toast before piling on the toppings — it makes all the difference!
Getting Ready for Fun in the Sun
Before jumping to the ingredients, let’s think about how to make the most of your sandwich experience. pair your sandwiches with a simple arugula salad or even a fruit platter to keep your picnic light and breezy.
For drinks, a refreshing lemonade will be a crowd-pleaser!
Here’s the thing: you’re not just making food; you're creating memories. each sandwich has its own story to tell, especially when you experiment with colorful toppings and fresh ingredients.
So why wait? it’s all about digging in and embracing those flavors that make summer so special.
Ready to get your hands a little messy? Let’s move on to the fun part — gathering those ingredients! It’s time to elevate your picnic game with some fabulous, healthy picnic recipes that everyone will rave about!

Essential Ingredients Guide: Unlocking Flavor and Freshness!
Hey there, fellow food lovers! are you ready to take your culinary game to the next level? whether you're meal prepping or cooking for a sunshine-filled picnic with friends, having the right ingredients in your kitchen is key.
Think of this as your go-to guide for all things delicious — let’s dive in!
Premium Core Components
Let’s talk about the premium core components that should be in every kitchen. When it comes to measuring, we’re all about precision! Here’s a quick look:
- Whole grain bread: Aim for four slices, about 1/2 inch thick (or 125g ). Look for a loaf that’s hearty and packed with seeds for a nice crunch.
- Cream cheese: You need 1/2 cup (around 113g ) for that creamy goodness. Check for a smooth texture when you open the package—if it feels grainy, don’t buy it!
Storage: Keep your bread frozen if you won't use it soon, and the cream cheese should chill in the fridge, where it’ll last about 3 weeks .
When it comes to freshness, make sure to pick fruits and veggies that are vibrant and firm. A ripe avocado for instance? You want it to give slightly when you squeeze it, but not too much!
Signature Seasoning Blend
No sandwich is complete without a signature seasoning blend . Here’s the scoop on essential combinations:
- Dill: Fresh dill makes everything pop. Just 1 tablespoon finely chopped will do! If you’re out of dill, fresh chives can also add a nice kick.
Mix these with herbs like parsley or basil for fresh and vibrant flavor that’ll elevate even the simplest open-faced sandwich.
Smart Substitutions
Sometimes, you find yourself missing an ingredient — don’t fret! This is where smart substitutions come into play:
- Missing whole grain bread? Sourdough or rye works like a charm!
- Want a dairy-free twist? Swap cream cheese for a homemade dairy-free spread like hummus!
Whenever you make open-faced sandwiches for picnics, be prepared with some emergency alternatives in your pantry, like canned tuna or even simple avocado, just in case!
Kitchen Equipment Essentials
Also, make sure you have the right tools in your kitchen for quick assembly recipes. Here’s a list of must-haves:
- A sharp knife for those beautiful avocado slices.
- A mixing bowl for your spreads.
- If you like toasted bread, a toaster or an oven works wonders!
Storage Tip: Use resealable bags for any prepped veggies to keep them fresh and crispy!
Easy Open-Faced Sandwiches: Your New Go-To!
Alright, time to get the ball rolling! Making easy open-faced sandwiches is not just a summer thing; they’re perfect for quick brunch ideas or just when you're craving a light lunch option.
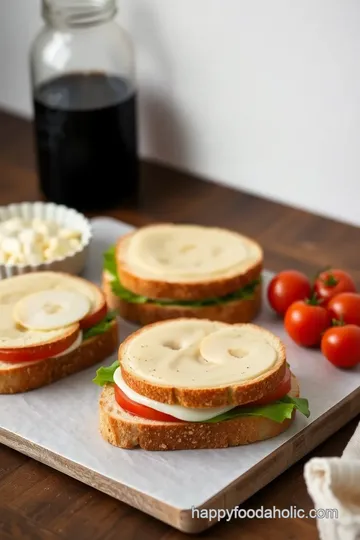
Here’s the recipe you’ve been waiting for: picnic-perfect open-faced sandwiches ! picture this: a big slice of whole grain bread topped with a creamy homemade cream cheese spread , fresh avocado, and vibrant veggies like tomato and arugula.
It’s colorful, it’s fresh, and oh-so-delicious.
But wait, there’s more! pile up some sliced roasted chicken on top for added protein. just imagine diggin’ into these beauties at your next casual outdoor dining event.
The best part? you’ve got room to get creative! explore vibrant vegetable toppings or even add some gourmet flair with smoked salmon and capers.
Now, who’s ready to jump into those step-by-step instructions ? Let’s make some delicious open-faced sandwiches that’ll have everyone coming back for seconds!
Professional Cooking Method: Mastering Open-Faced Sandwiches
Oh my gosh, have you ever thought about how simple yet elegant open-faced sandwiches can be? it’s crazy how a slice of bread topped with delicious goodies can make a meal feel gourmet! whether you’re gearing up for a sunny picnic or looking for quick brunch ideas, mastering the art of making open-faced sandwiches is a game changer.
Let’s explore some professional cooking methods you can use to step up your game!
Essential Preparation Steps
First things first, let’s talk mise en place . this fancy french term just means having everything prepped and ready to go before you start cooking.
For our open-faced sandwiches, you want your ingredients—like sliced tomatoes, creamy spreads, and vibrant greens—all laid out. it makes assembly a breeze!
Next, time management is key. spend about 15 minutes on prep . have your bread picked out (whole grain is perfect!), and any roasted chicken or grilled veggies at the ready.
If you're trying to whip these up in a hurry for a last-minute picnic, you'll appreciate being organized.
Speaking of organization, have a cleanup plan, too. toss your trash as you go. trust me, it will make your life so much easier.
And don’t forget about safety! make sure to keep those veggies washed and your cutting utensils sanitized. you want your sandwiches to be not just tasty but safe to eat!
Step-by-Step Process
Alright, ready to dive in? Here’s how to make your scrumptious open-faced sandwiches step by step:
- Prepare the Spread : Mix ½ cup cream cheese with a tablespoon of fresh dill and a bit of lemon juice. Spread it on the bread. Boom!
- Toast the Bread : If you want a little crunch, pop those slices in the oven at 375° F ( 190° C) for 5- 7 minutes . You’ll want them golden brown—not charcoal!
- Layer on the Goodies : Slice up your avocado and layer it generously on the bread. Add fresh tomato and a handful of arugula.
- Add Some Protein : If you have cooked and sliced roasted chicken or grilled veggies, throw them on top. This step is where you add some serious flavor!
- Serve : Slice them in half for presentation if you'd like. Serve right away, and enjoy your culinary creation!
One thing to watch out for? Timing! You want everything fresh and crunchy. If prepped right before serving, your sandwiches will be a hit!
Expert Techniques
Let’s up the ante with some expert techniques . when it comes to flavor, get creative with your toppings! try using layered sandwich ideas like layering spicy roasted red peppers or pickled veggies.
Also, keep an eye on the quality of your ingredients. fresh is best!
Keep your station clean and return any unused items back to their homes so the chaos doesn’t unfold on your counter.
And if something goes wrong—like a soggy bread issue—don’t panic! just use a little more cream cheese spread to hold the toppings in place.
Success Strategies
Common mistakes? we all make them! avoid overloading your sandwich. too much on there can lead to a messy experience, and no one wants that at a picnic, right? make sure to include quality assurance tips—like double-checking that your bread hasn’t gone stale.
Also, if you want to get ahead, consider prep-ahead strategies. you can whip up your homemade cream cheese spread a day in advance and keep it in the fridge! just spread it on before your guests arrive—it’s a great way to have things ready for casual outdoor dining.
To wrap it all up, making open-faced sandwiches for picnics not only celebrates fresh flavors but also invites you to play with your food! with these simple guidelines and a sprinkle of creativity, you can make delicious sandwiches that shine, whether it’s a bright summer day or a cozy brunch at home.
Additional Information
Oh, and while we’re on the topic of picnics and sandwiches, don’t forget to consider seasonal vegetable sandwiches or even a drizzle of fancy balsamic glaze over your creations! Whatever you choose, your open-faced sandwich journey awaits—so grab those ingredients and get ready to impress!
Pro Tips & Secrets: Elevate Your Open-Faced Sandwich Game
Alright, friends, let’s dive into the nitty-gritty of making the best open-faced sandwiches for picnics . these little treasures are all about fresh ingredients and vibrant flavors.
So, how do you make them pop? here are some secrets i’ve picked up along the way!
Chef’s personal insights: first off, always taste as you go. it’s your sandwich, so make it sing! if you think it needs a little oomph, add a dash more lemon juice or some fresh herbs.
Time-Saving Techniques: Don’t be afraid of shortcuts. You can snag pre-roasted veggies or rotisserie chicken instead of making everything from scratch. It’s all about enjoying the process, not stressing over it!
Flavor enhancement tips: a sprinkle of salt really brings out the flavors of your fresh ingredients. if you’re feeling fancy, a drizzle of balsamic reduction can add that extra flair to your sandwich.
Presentation advice: let’s be real; we eat with our eyes first! arrange your toppings artfully, and don’t forget to play with colors.
A pop of bright red tomatoes against creamy avocado? yes, please.
Perfect Presentation: Plating Like a Pro
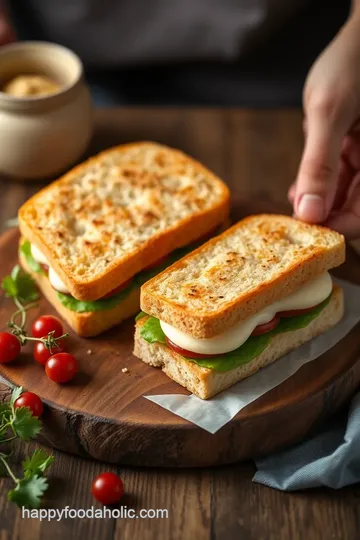
Now, let’s get into how to make those sandwiches look fabulous. You want folks to grab them off the picnic blanket and say, “Oh my gosh, did you make these?”
Plating Techniques: Use a nice cutting board or a vibrant plate—whatever feels fresh. Slice your sandwiches on a slight angle for that gourmet vibe.
Garnish Ideas: A sprinkle of microgreens or fresh herbs on top can really dress things up without much effort.
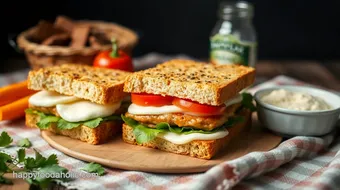
Color Combinations: Go for complementary colors. That bright green arugula and sunny yellow tomatoes? Instant appeal!
Visual Appeal Tips: Don’t be shy to layer your sandwiches high! The more dynamic and inviting they look, the quicker they’ll disappear.
Storage & Make-Ahead: Keeping It Fresh
Let’s talk logistics. We want these sandwiches tasting as good as they look even after a few hours in the sun.
Storage Guidelines: If you're prepping ahead, keep the toppings and spreads in separate containers. This keeps everything fresh and crunchy!
Preservation Methods: You can cover the spread with plastic wrap to prevent it from drying out. Just remember: keep that avocado and any proteins separate until it’s time to eat.
Reheating instructions: if you do choose to toast the bread beforehand, give it a quick reheat in the oven at 375° f for about 5 minutes before serving.
It’ll help revive that crispy delight!
Freshness Duration: Honestly, these open-faced sandwiches are best enjoyed right away. But if you must make them ahead, they’ll stay good in the fridge for a day.
Creative Variations: Get Adventurous!
Now, let’s spill some tea on how to get creative with your easy open-faced sandwiches . The possibilities are endless!
Flavor Adaptations: Try a spicy cream cheese or a zesty guacamole spread if you’re feeling adventurous. It’s all about that flavor explosion!
Dietary Modifications: Have gluten-free friends? No problem! Use gluten-free bread or lettuce wraps instead.
Seasonal Twists: As the seasons change, so can your toppings! In summer, load up with grilled veggies. When fall comes, think roasted butternut squash and feta.
Regional Variations: Don’t forget the classic New York deli style! Swap in some smoked salmon and capers for an elegant touch.
Complete Nutrition Guide: Stay Smart & Savvy
To keep your outdoor dining a little healthier, let’s break down the numbers .
Detailed Breakdown: Each sandwich offers balanced nutrients—thanks to whole grain bread, healthy fats from avocados, and a protein punch if you add chicken.
Health Benefits: Whole grain bread brings in fiber, while the fresh veggies are loaded with vitamins. It’s a win-win for your gut and your taste buds!
Dietary Considerations: If you’re watching your carbs or fats, you can easily tweak the ingredients. Swap cream cheese for a dairy-free version if that’s your jam.
Portion Guidance: For a light lunch, one sandwich should do the trick. If you’re feeling snacky, maybe two!
Expert FAQ Solutions: Your Burning Questions Answered
Before we wrap up, let’s tackle some common questions!
Common Questions: “Can I freeze these sandwiches?” Not really, my friend. They’re best fresh!
Troubleshooting Guide: If your toppings are sliding off, try to stack them more securely. Layer it right!
Success Tips: The key to a perfect open-faced sandwich is balance. Don’t overload; keep it simple yet flavorful.
Variations Explained: If you don’t like arugula, swap it with spinach or a fresh herb salad. It’ll still be a fresh ingredient sandwich, but with your own twist.
Conclusion: Let’s Get To It!
So there you have it! whether you’re prepping for a picnic, brunch, or just a laid-back lunch, these open-faced sandwiches for picnics are sure to impress.
With just a little creativity and some fresh ingredients, you can whip up delicious bites that are both beautiful and packed with flavor.
Remember, cooking should be fun and enjoyable. Don’t stress too hard; just savor the process, experiment, and make those sandwiches sing! Happy cooking, y’all!
Picnic-Perfect Open-Faced Sandwiches Card
⚖️ Ingredients:
- 4 slices of hearty whole grain bread (about 1/2 inch thick, 125g)
- 1/2 cup of cream cheese (113g)
- 1 tablespoon fresh dill, chopped (or 1 teaspoon dried dill, 2g)
- 1 teaspoon lemon juice (5ml)
- Salt and pepper to taste
- 1 ripe avocado, sliced (about 200g)
- 1 medium tomato, sliced (about 150g)
- 1/2 cup arugula (35g)
- Optional: 1 cup cooked and sliced roasted chicken, turkey, or grilled vegetables
🥄 Instructions:
- Step 1: In a mixing bowl, combine cream cheese, dill, lemon juice, salt, and pepper. Mix until smooth and creamy.
- Step 2: If desired, toast the slices of bread on a baking sheet in a preheated oven at 375°F (190°C) for 5-7 minutes or until golden brown.
- Step 3: Spread a generous layer of the cream cheese mixture onto each slice of toasted bread.
- Step 4: Layer avocado slices evenly over the cream cheese on each slice.
- Step 5: Add slices of tomato and a handful of arugula on top.
- Step 6: If using, add sliced roasted chicken or grilled vegetables on top of the assembled sandwiches.
- Step 7: Slice the sandwiches in half if desired, and serve immediately, or cover and refrigerate until needed.
Previous Recipe: How to Make Delicious Sautéed Chicken Rolls with Creamy Spinach
Next Recipe: How to Bake Chicken Lasagna: Family-Friendly Delight for Everyone!