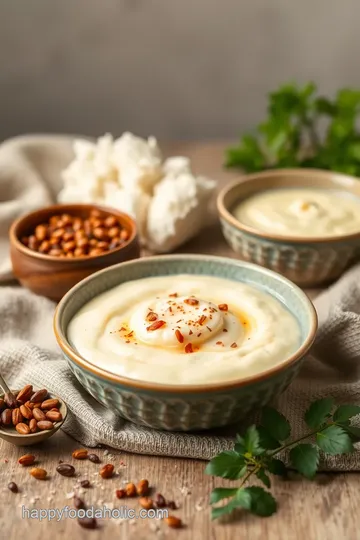
Kheer: Creamy Rice Pudding Dessert
Looking for a delicious comfort dessert? Cook Kheer: Creamy Rice Pudding Dessert like my grandmother used to, filled with love and aromatic spices. Enjoy every spoonful!

- A Sweet Journey into Kheer: Creamy Rice Pudding Dessert
- The Legacy of Kheer
- Why Kheer Rocks
- A Taste Adventure Awaits
- Essential Ingredients Guide for Kheer: Creamy Rice Pudding Dessert
- Unlocking the Secrets of Professional Cooking: An Easy Guide
- Pro Tips & Secrets to Elevate Your Kheer Game
- Perfect Presentation: Make Your Kheer Shine
- Storage & Make-Ahead: Extend the Joy of Your Kheer
- Creative Variations: Spice Up Your Kheer
- Complete Nutrition Guide: Indulgence with Awareness
- Expert FAQ Solutions
- Conclusion: look into Into the Delight of Kheer!
- Recipe Card
A Sweet Journey into Kheer: Creamy Rice Pudding Dessert
Oh my gosh, let me take you back for a moment. picture this: i'm sitting at my grandma's kitchen table, the smell of something sweet wafting through the air.
She’d be cooking her famous kheer , creamy rice pudding, and all i could think of was diving right into that deliciousness.
Honestly, there’s something magical about this indian dessert that just warms your heart and fills your belly with pure joy.
So, if you’ve been wondering how to cook kheer: creamy rice pudding dessert , you’re in the right place!
The Legacy of Kheer
Kheer has roots that go way back in indian history. like, seriously, we’re talking ancient times. traditionally made during festivals and special occasions, this dessert symbolizes togetherness, sweetness, and hospitality.
Fast forward to today, and kheer is a popular staple, enjoyed in homes across india and beyond – no need to wait for a celebration, you know?
Now, let’s get to the best part. this easy kheer recipe is not only straightforward but also flexible. you can whip it up in about 1 hour and 30 minutes from start to chilled dessert delight.
Plus, it’s super affordable with just a few ingredients, and you can easily serve 4-6 people . trust me, your friends will be asking for seconds!
Why Kheer Rocks
Let’s just put it out there: kheer is not just another pudding. here’s why it's a game-changer. first off, it’s loaded with health benefits.
You get the goodness of basmati rice , whole milk, and a sprinkle of cardamom, all in one bowl. it’s a nourishing vegetarian rice pudding , ideal for comforting evenings or festive gatherings.
Kheer can be your go-to celebratory dessert . whether it’s a birthday, diwali, or just tuesday – who needs a reason to indulge? the beauty lies in its adaptability.
You can toss in nuts for that crunchy delight or throw in saffron for a regal touch. kheer with nuts is always a hit, particularly with almonds and pistachios giving it that nutty punch.
Plus, who doesn’t love a dessert that gets better when chilled ? just imagine digging into that smooth, creamy goodness after keeping it cool for a while.
Straight-up comfort food dessert , i say!
A Taste Adventure Awaits
So, are you ready to dive in? if you’re intrigued by the flavors of india and love a good pudding dessert , kheer is calling your name.
Let me give you a sneak peek of what you need to get started. are you thinking about trying a coconut kheer recipe or perhaps feeling adventurous with a chocolate kheer recipe ? there are endless kheer variations you can explore, and they’re all worth a shot!
Before we roll up our sleeves and get cooking, grab a heavy-bottomed saucepan and let’s start gathering those ingredients. simple, flavorful, and oh-so-satisfying—make sure to keep that sweet rice dish in mind for your next gathering or cozy night in.
Ready for a delicious adventure? Let’s check out what you’ll need to cook this creamy masterpiece!
Essential Ingredients Guide for Kheer: Creamy Rice Pudding Dessert
Alright, friends! if you're ready to dive into the world of making kheer , let me tell you, you're in for a real treat.
This creamy rice pudding dessert is not just a secert from india but is a beloved comfort food that warms the heart.
But first, let’s get ourselves prepped with some essential ingredients and tips to create this sweet rice dish . whether you’re planning to whip up a traditional kheer for a festive occasion or just to enjoy at home, this guide will make your cooking journey smooth and fun.
Premium Core Components
Measurements matter! whenever you’re baking or cooking, you gotta measure right. for the kheer, you’ll need about 1/4 cup (50g) of basmati rice .
That’s perfect for those looking to make around 4-6 servings . for the liquid gold, grab 4 cups (950ml) of whole milk .
Trust me, don’t skimp on the milk; it’s what gives kheer its signature creaminess!
Quality Counts: Look for rice that’s fragrant and whole. For the milk, full-fat is best. I always check the expiration date before buying—nothing worse than sour milk ruining your dessert!
Storage tips: after cooking, if you have leftovers (though, let's be honest, that rarely happens), keep the kheer in an airtight container in the fridge for about 3-4 days.
You'll want to let it cool down a bit before popping it in the fridge. if you’re feeling adventurous, you can freeze it, but i’d recommend enjoying it fresh when possible.
Signature Seasoning Blend
Kheer could be just plain creamy sweetness, but oh, we’re going in for the fun flavors too! for this dessert, you’ll need 1/4 teaspoon cardamom powder for that warm aroma.
If you want to feel extra fancy, add a pinch of saffron strands . it elevates the kheer into a luxurious experience, trust me.
Herb Selections: Honestly, there’s not much herb action here, but if you’re feeling wild, throw in some nutmeg —it’s totally optional but can add a nice warmth to the blend.
Smart Substitutions
So, what if you’re missing something? no sweat! you might not have basmati rice handy. you can totally substitute it with whatever short-grain rice you have.
And if you prefer a vegan option , try swapping out the milk for coconut milk. in fact, a coconut kheer recipe is something you should definitely try out sometime.
Kitchen Equipment Essentials
Now let’s talk about the tools you’ll need. a heavy-bottomed saucepan is a must! this helps prevent your milk from scorching, which is a total buzzkill.
You’ll also want a wooden spoon for stirring; it gives that rustic feel while keeping it classic.
Don't forget those measuring cups and spoons! When it’s game time, just grab your prep tools, and you’re ready to become a kheer superstar.
Final Thoughts Before Cooking
Alright, before we get into the instructions, let me just say this: cooking kheer is more than just a recipe; it’s an experience! every creamy bite will take you back to moments of warmth and joy.
The best part? you can customize it with different nuts or flavors. feeling like a nutty rice pudding? go for almonds and pistachios, or even raisins for a chewy twist!
So, are you ready to learn how to cook kheer: creamy rice pudding dessert ? you’ll feel like a rockstar in the kitchen, impressing everyone with how simple yet amazing this indian dessert can be! let’s get into those detailed step-by-step instructions that will make your creative juices flow.
Happy cooking!
Unlocking the Secrets of Professional Cooking: An Easy Guide
Alright, folks! let’s dive into the world of professional cooking methods, where precision meets good old home cooking vibes. whether you're making a smooth kheer: creamy rice pudding dessert or a sizzling stir-fry, mastering the prep and processes can elevate your culinary game.
So, grab your apron!
Essential Preparation Steps
You know what they say: "failing to plan is planning to fail." and in the kitchen, that couldn't ring truer.
Here’s where mise en place comes in. you’ll want to measure and organize your ingredients before you kick things off.
It’s as easy as having your rice, milk, and spices lined up and ready to go.
Time management? oh man, it’s crucial! track your cooking time like it’s the last two minutes of a nail-biting game.
For instance, when you're cooking your kheer, focus on simmering that milk for about 30- 40 minutes . use a timer, folks—trust me!
Remember: organization is key! arrange your workspace so that everything is within reach. safety is essential too. when you’ve got hot liquids and sharp knives flying around, make sure to stay alert.
Keep a damp cloth handy to wipe spills.
Step-by-Step Process
Let’s get to the nitty-gritty with some clear, numbered instructions.
-
Toast the rice: start by heating your heavy-bottomed pan over medium heat. toss in 1/4 cup (50g) of rinsed basmati rice.
Toast it for about 2- 3 minutes until you catch that lovely, nutty aroma.
-
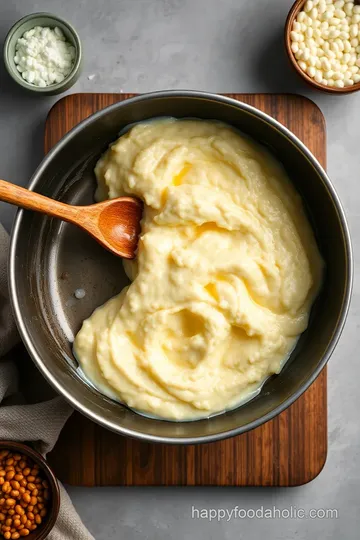
Cook the rice: pour in 4 cups (950ml) of whole milk. turn your heat up to bring it to a gentle boil, then lower it to a simmer.
You’ll be simmering for 30- 40 minutes , giving it a stir every now and then. keep a close eye—our goal is that creamy texture without the burn!
-
Add sweetness and flavor: after the rice is soft, stir in 1/2 cup (100g) sugar and 1/4 teaspoon cardamom powder.
This mix can cook for another 5- 10 minutes to meld those flavors together.
-
Finish the Kheer: Pull it off the heat and add a tablespoon of butter if you want ultimate creaminess. Let it cool a bit.
-
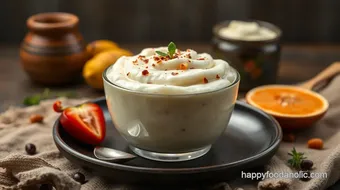
Garnish the Goodness: Top it with chopped nuts and raisins, then chill for 30 minutes at least. But hey, if you can’t wait, it’s also delicious warm!
Expert Techniques
Now, let’s talk about those pro tips. Use a heavy-bottomed pan —this is your best friend against scorching milk! If things feel too thick, don’t hesitate to add a splash of milk.
Quality checkpoints are vital. As you cook, check the rice for tenderness. When it’s creamy and luscious, you know you’ve hit the jackpot.
What if things go south? No idea how? If your kheer is too watery, let it simmer longer. If it’s too thick, you can add milk and keep stirring gently.
Success Strategies
Now, don’t go making rookie mistakes! A key error is overcooking your rice before adding milk. Give it a good soak for about 30 minutes in advance if you can.
For quality assurance, always taste as you go! Adjust sugar and cardamom to fit your flavor palate.
And let’s not forget about make-ahead options . Kheer becomes even more delicious after chilling! So, whip it up a day in advance and let those flavors marry.
Additional Information
Serving up a steaming pot of kheer: creamy rice pudding dessert is always a hit with friends and family. this indian dessert is more than just food; it’s wrapped in nostalgia, comfort, and flavor.
Whether it’s during holidays or just a rainy day, this sweet rice dish warms the heart. try out variations like coconut kheer or even a funky chocolate kheer recipe to surprise your taste buds.
Now, who wouldn’t want to impress with tasty treats like these? happy cooking, and enjoy every spoonful!
Pro Tips & Secrets to Elevate Your Kheer Game
Oh my gosh, let's dive into some insider tips to take your kheer to the next level! i've learned a ton through trial and error, so let me share a few of my absolute favorites with you.
First off, don’t be shy about adjusting your sweetness! some folks love it super sweet, while others prefer a lighter touch.
Start with half the sugar, taste as you go, and add more if needed. this way, your creamy kheer will be tailored perfectly to your palate!
Also, try some time-saving techniques! you know what i do? i often portion out my nuts and dried fruits ahead of time.
When you're ready to whip up that easy kheer recipe , everything’s right at your fingertips. it makes the process so much smoother, like a well-oiled machine!
And let’s talk flavor enhancement. a sprinkle of sea salt can elevate the vanilla and nutty flavors in your pudding.
Seriously, just a tiny pinch can work wonders. if you're feeling adventurous, try adding a splash of rose water or a little cinnamon along with the cardamom.
Yum!
Perfect Presentation: Make Your Kheer Shine
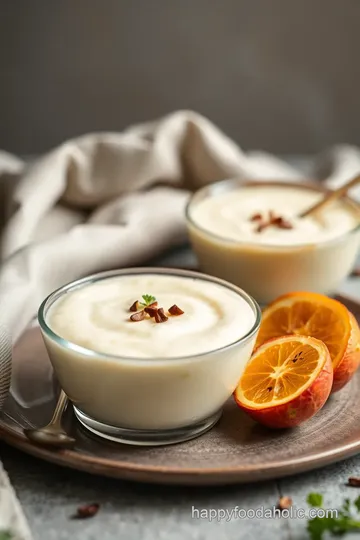
Alright, let’s get to the fun part: how to make your kheer look as good as it tastes! plating techniques can turn your dessert from basic to jaw-dropping.
Try serving your kheer in individual dessert bowls. layer it with some crushed nuts on top and fresh mint leaves for a pop of color.
Seriously, people will think you’re a five-star chef!
Speaking of color, don't underestimate the power of visual appeal. you can contrast the creamy, gold hue of your kheer with the bright greens of pistachios and the warm earth tones of almonds .
It’s about creating a feast for the eyes before it even reaches the taste buds!
When it comes to garnishes, go wild! Think about adding edible flower petals or a drizzle of honey on top. Not only does it taste amazing, but it looks super fancy too.
Storage & Make-Ahead: Extend the Joy of Your Kheer
Now, let’s chat about storage . kheer is super forgiving. if you've made a batch and can't finish it all (but who can resist?), just pop it in the fridge! it can last about 3-5 days in an airtight container.
Just remember, it might thicken up a bit in the fridge, so add a splash of milk when you reheat.
If you're planning to make this a day ahead of time for a party , that’s a smart move! just a tip: make sure to let it chill completely before storing.
The flavors really meld together overnight, making it even tastier.
Creative Variations: Spice Up Your Kheer
Okay, this is where the fun really begins! kheer variations are limited only by your imagination. loving tropical flavors? try a coconut kheer recipe by swapping some milk for coconut milk.
It brings a whole new vibe and is totally refreshing.
Feeling adventurous? how about a chocolate kheer recipe ? just stir in cocoa powder while cooking—perfect for chocolate lovers. the possibilities are endless! you could even craft a nutty rice pudding by adding any nuts you fancy.
Complete Nutrition Guide: Indulgence with Awareness
Now, i’m not saying kheer is health food , but it does have some benefits! it's made mainly from whole milk and rice, so you’re getting some calcium and carbs .
Plus, with those nuts you’re adding, you’re getting healthy fats and protein too!
A typical serving has around 280 calories , but hey, it's a comfort food dessert , so a little indulgence never hurt anyone, right? just keep an eye on portion sizes if you're watching what you eat.
Expert FAQ Solutions
You might still have questions. that’s totally normal! what do you do if your kheer isn’t thickening? just keep cooking it on low heat and stir frequently.
Patience is key here… trust me!
Another common question: How can you make it vegan? Simple! Substitute dairy milk with almond or coconut milk. You can still enjoy this delicious Indian dessert without the dairy.
Conclusion: look into Into the Delight of Kheer!
So there you have it! you’re all set to cook kheer: creamy rice pudding dessert . don't be afraid to experiment and add your own flair.
Whether you stick with traditional flavors or go wild with coconut and chocolate, this dessert will surely please. it’s all about the love you put in and the joy it brings to those around you.
So go ahead, make it, and enjoy every bite. happy cooking!
Kheer: Creamy Rice Pudding Dessert Card
⚖️ Ingredients:
- 1/4 cup (50g) basmati rice, rinsed and drained
- 4 cups (950ml) whole milk
- 1/2 cup (100g) granulated sugar (adjust to taste)
- 1/4 teaspoon cardamom powder
- 1/4 teaspoon saffron strands (optional)
- 1 tablespoon (15g) unsalted butter (optional for richness)
- 2 tablespoons chopped almonds
- 2 tablespoons chopped pistachios
- 2 tablespoons raisins
- A pinch of nutmeg (optional)
🥄 Instructions:
- Step 1: Heat a heavy-bottomed saucepan over medium heat.
- Step 2: Add the rinsed basmati rice and lightly toast for 2-3 minutes until fragrant.
- Step 3: Pour in the whole milk and stir. Bring to a gentle boil, then lower the heat to simmer.
- Step 4: Cook for about 30-40 minutes, stirring frequently, until rice is cooked and the mixture thickens.
- Step 5: Stir in the sugar, cardamom powder, and saffron strands (if using). Cook for an additional 5-10 minutes until dissolved and well combined.
- Step 6: Remove from heat and stir in the optional butter for added creaminess.
- Step 7: Allow it to cool slightly, then transfer to serving bowls.
- Step 8: Top with chopped nuts and raisins.
- Step 9: Refrigerate for at least 30 minutes before serving, or enjoy warm.
Previous Recipe: Ultimate Crispy Coconut Chicken Kebabs with Onions: A Flavorful Twist!
Next Recipe: How to Make the Best Fried Chicken Schnitzels with Crispy Coating