Heavenly Baked Mini Donuts with Sweet Chocolate Glaze
Looking for a sweet treat? Join me in my kitchen as we bake mini donuts with sweet chocolate glaze. They're light, fluffy, and perfect for any occasion!

- Ready, Set, Donut!
- The Sweet Story Behind the Donuts
- Why You’ll Love These Baked Mini Delights
- Last Thoughts Before We Get Baking!
- Your Go-To Essential Ingredients Guide
- The Secret to Professional Cooking: Mastering Baked Mini Donuts with Sweet Chocolate Glaze
- Bake Mini Donuts with Sweet Chocolate Glaze: The Ultimate Guide
- Recipe Card
Ready, Set, Donut!
Oh my gosh, have you ever bitten into a donut and thought, why don’t i make these at home more often? i mean, seriously! these fluffy rings of joy are like little hugs in dessert form.
And if you’re anything like me, you want to bake mini donuts with sweet chocolate glaze that taste just as good as the ones from your favorite café.
Spoiler alert: they absolutely will!
Let’s chat for a minute. remember that moment when you first learned to ride a bike? it was a little tricky at first, but once you got the hang of it, you were off to the races! well, that’s how baking mini donuts feels too! plus, they’re not just for breakfast anymore.
Welcome to the ultimate sweet donut glaze dream!
The Sweet Story Behind the Donuts
Donuts have been around for ages. they’ve got roots tracing back to the days of dutch settlers who brought fried cakes to new york.
Crazy, right? fast forward to today, and they’ve evolved into a must-have treat at all kinds of gatherings. from kid’s birthday parties to morning meetings—everyone loves these indulgent breakfast treats.
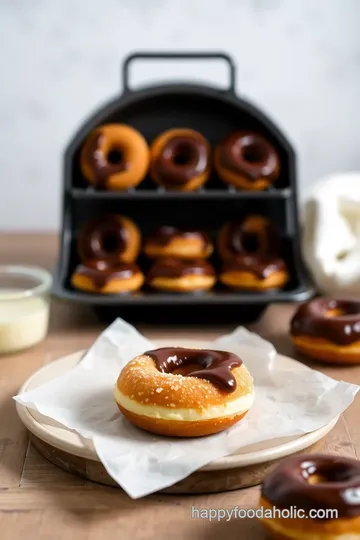
Baked mini donuts are a total game changer. they take less time, and you can whip them up without the fuss of frying.
And honestly? who needs that mess? this recipe is beginner-friendly—total thumbs up for newbies! it takes about 15 minutes to prep and then around 10-12 to bake.
Before you know it, you’ve got about 12 glorious mini donuts fresh out of your oven. perfect for sharing or keeping all to yourself (no judgment here!).
Why You’ll Love These Baked Mini Delights
Now, let’s get into the good stuff—the benefits. first off, baked donuts are a healthy-ish alternative to the fried ones.
I mean, we’re still living in a dessert world, but we can make choices, right? these delightful mini donuts are light and fluffy , carrying hints of vanilla with every bite.
Nutrition-wise, they’re not meant to be gym food, but they come in at around 150 calories each, so you won’t completely wreck your day.
Pair them with fresh fruit or yogurt, and you’ve got yourself a balanced breakfast or snack!
And let’s not forget about special occasions! whether you’re throwing a festive party or need a quick treat for a bake sale, these donuts fit like a glove.
Plus, they’re super easy to decorate with fun donut toppings —think sprinkles, coconut flakes, or even some crunchy nuts. your creativity is the only limit here!
Last Thoughts Before We Get Baking!
So, are you ready to dive into the world of donuts? trust me, there's nothing like biting into a fluffy donut topped with homemade chocolate glaze.
It feels like magic, and once you learn how to make donuts from scratch, your brunch game will never be the same again.
Get those aprons on, friends. it’s time to gather your ingredients and start baking some easy donut recipes that will have friends and family begging for the recipe.
Next up, we’ll talk about what you need to get started!

Your Go-To Essential Ingredients Guide
When it comes to baking those heavenly baked mini donuts with sweet chocolate glaze , the right ingredients can make all the difference.
No one wants to bite into a donut that’s just blah , you know? so let’s break down those essential ingredients that’ll help you nail every delicious bite!
Premium Core Components
Let’s start with the basics . Knowing your ingredients is key. Here’s a quick run-down on some premium components you’ll want to keep in your pantry.
-
All-purpose flour : you’ll need about 1 cup (120g) . always check for a fresh, clean smell. if it’s musty, toss it out.
Store it in an airtight container; it’ll last about 6-12 months.
-
Granulated sugar : Roughly 1/2 cup (100g) will sweeten your life! Look for finely granulated sugar without clumps. Same storage rules apply here—keep it dry and cool.
-
Baking powder : Grab a teaspoon. If it fizzes with vinegar, it’s good to go. Replace it every 6 months for optimal effectiveness.
-
Salt : Just 1/4 teaspoon adds flavor. Check for any lumps; if it’s hard, get rid of it.
-
Eggs : Use large eggs, about 1 should do. Fresh eggs will bounce a bit when you crack them. Store in the fridge for about 3-5 weeks.
Signature Seasoning Blend
Now onto the flavor enhancers . This is where we really make those donuts pop!
-
Ground cinnamon : Only 1/2 teaspoon of this magical spice. It’s a comfort flavor and goes well with chocolate glazed donuts . Look for rich color and fragrance.
-
Fresh herbs : If you're feeling adventurous, consider adding a sprinkle of fresh mint or basil to your glaze!
Smart Substitutions
Life happens, and sometimes you’re out of an ingredient. Here are some smart substitutions to keep you baking:
-
Out of buttermilk ? No worries! Mix 1/2 cup of milk plus 1/2 tablespoon of lemon juice and let it sit for just a few minutes.
-
Sugar alternatives ? Try honey or agave for a healthier twist.
Kitchen Equipment Essentials
Having the right tools makes all the difference, my friend.
-
Mini donut pan : A must-have! Your bag of tricks wouldn’t be complete without one. Yes, it’s the key to those fluffy donuts we love!
-
Mixing bowls and whisk : Grab a good set; it’ll make mixing your ingredients sooo much easier.
-
Piping bag or zip-top bag : Perfect for that sweet donut glaze! Just snip off a corner and go to town.
-
Cooling rack : This is essential for letting your donuts cool down. You don’t want to glaze melted chocolate, right?
Final Thoughts
So, whether you're trying to bake donuts without frying or whip up some homemade mini donuts , it's all about knowing your essential ingredients.
Keeping your pantry stocked with fresh, quality items makes baking a breeze. plus, you get to mess around with flavors and substitutions until you hit that sweet spot.
Ready to dig into the step-by-step instructions for those delightful minis? Trust me, you’re in for a treat!
The Secret to Professional Cooking: Mastering Baked Mini Donuts with Sweet Chocolate Glaze
Okay, y’all. if you ever wanted to make something that takes your dessert game from “meh” to “whoa,” you’ve got to bake mini donuts with sweet chocolate glaze .
These tiny treats are not just delicious; they’re easy to whip up, and i promise you, your friends will think you’re a total rock star in the kitchen! let's break it down.
Essential Preparation Steps
Mise en place . seriously, this fancy french phrase just means "everything in its place." before you even think about turning on that oven, grab all your ingredients and tools.
You don’t want to be halfway through mixing when you realize you forgot the key ingredient, like the buttermilk!
Now, let’s talk time management . It’s all about keeping things moving smoothly. Set a timer when you've got those mini donuts in the oven— 10- 12 minutes at 350° F ( 175° C) goes by fast when you're daydreaming about that chocolate glaze!
Organization strategies ? keep your workspace clean and tidy. a messy counter leads to chaos, and you don’t want to end up with flour in your hair.
Plus, it’ll be easier to clean up afterward.
And please, think about safety considerations . the oven heats up, so make sure to use oven mitts when pulling out your mini donuts.
Ouch! no one needs a burnt hand to ruin their baking experience.
Step-by-Step Process
Ready for the fun part? Follow these numbered instructions and you won’t go wrong!
- Preheat the oven to 350° F ( 175° C) —you want it all nice and toasty.
- Prepare your mini donut pan by greasing it lightly. Ain’t nobody got time for stuck donuts.
- Mix your dry ingredients : flour, sugar, baking powder, and all those spices. Whisk it good.
- Combine your wet ingredients : buttermilk, egg, melted butter, and the good old vanilla extract. Whisk until smooth.
- Pour that delightful wet mix right into the dry ingredients and stir gently. Don’t overmix or else those donuts will be tougher than a two-dollar steak!
- Fill the pan about 2/3 full —don’t want them overflowing like a volcano!
- Bake those babies for 10- 12 minutes . Keep an eye on them—golden edges are your visual cue for doneness.
- Once out of the oven, let them cool for about 2 minutes in the pan before transferring to a rack.
Expert Techniques
Now, for the professional methods ! Pay close attention because these are the critical steps for success.
- First, check for quality . Use fresh baking powder! If it’s expired, your donuts could end up dense instead of fluffy.
- Next, let your donuts cool completely before glazing. If you don’t, the glaze will melt right off.
And if something goes wrong? Don’t panic! You could always top those imperfect donuts with some cinnamon sugar or sprinkles, and no one would know the difference.
Success Strategies
Avoid common mistakes, my friend! Here are some do’s and don’ts for perfect results:
- Do measure your flour correctly—spoon it into the cup then level it off.
- Don’t skip the glaze! Without it, they’re just plain old muffins, y’know?
- If you want to make it ahead, consider freezing the donuts without glaze. Just pull them out, glaze when you’re ready, and bam—instant indulgent breakfast treats.
Feeling adventurous? Try different donut toppings , like sprinkles or a drizzle of caramel. You know, get creative!
So, there you have it! you’re all set to bake mini donuts with sweet chocolate glaze . and honestly, won't it be so fun to whip these up for your next brunch or even a little get-together with friends? just imagine everyone sitting around the table with a plate of your homemade mini donuts , coffee in hand, and the sweet smell of chocolate in the air.
Additional Information
For those looking to explore more about baked goods, consider diving into creative flavors or even healthy donut alternatives. With some practice, you'll be a donut baking pro in no time! Happy baking, everyone!
Bake Mini Donuts with Sweet Chocolate Glaze: The Ultimate Guide
Oh my gosh, if you’ve never tried to bake mini donuts with sweet chocolate glaze , you are seriously missing out! these are not just any donuts; they are fluffy, indulgent, and perfect for a sweet treat or a fun breakfast.
Let’s dive into some nuggets of wisdom, tips, and extra info to make your donut-making adventure a total success!
Pro Tips & Secrets
Here’s the scoop straight from my kitchen to yours. first off, keep it simple . if you’re a beginner, don't freak out! this is an easy donut recipe.
Just mix the wet and dry ingredients separately, then combine. it’s literally that simple!
Want to save time? prep your ingredients in advance. have everything ready to go, so once you start mixing, you’ll have a smooth ride.
Trust me, nothing feels better than a no-fuss baking experience. and to punch up the flavor? a pinch of salt can make a world of difference.
It enhances all those sweet notes in your donuts.
Finally, for that gorgeous finish, let your chocolate glaze set a bit before serving. It not only looks pretty, but it also tastes better when it’s not dripping everywhere!
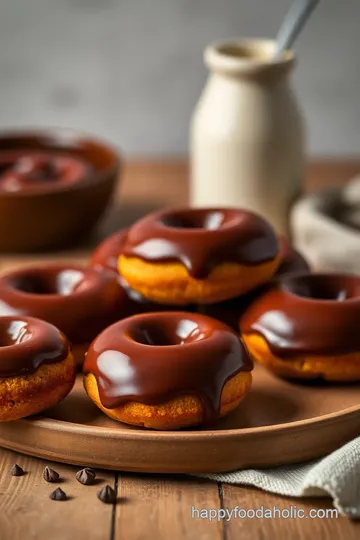
Perfect Presentation
Let’s get a lil’ fancy! when you’re ready to plate up your donuts, think colors . bright, fresh fruits like berries or a sprinkle of powdered sugar can transform your plate from drab to fab.
Oh, and don’t skip the garnishes! a light dusting of cinnamon sugar adds a little extra zing. if you're feeling adventurous, try melted chocolate swirls or even colorful sprinkles.
Kids love those!
Presentation is key, and that means plopping your donuts onto a nice platter or cake stand. Keeps things neat and ultra-presentable, especially if you’re bringing them to a party or brunch.
Storage & Make-Ahead
Let’s talk storage ! if you happen to have some mini donuts left over (which, let’s be honest, is a rare feat), just pop ‘em in an airtight container.
They usually stay fresh for about 2-3 days at room temperature. for longer storage, consider freezing them. just wrap each donut in plastic wrap and toss them in a zip-lock bag.
They’ll be good for about a month!
For the best results when you’re ready to eat, simply reheat them in the microwave for about 10-15 seconds. They’ll taste just like fresh-out-of-the-oven donuts!
Creative Variations
Feeling a little creative? micro-flavor bursts can take your donuts from basic to extraordinary. for example, try swapping out regular vanilla for almond extract.
Or, add some citrus zest to the batter for a refreshing citrus twist! you could also adapt to seasonal flavors—pumpkin spice for fall, peppermint for winter, you name it!
Try some healthy donut alternatives too! for example, using whole wheat flour could add a nutty flavor and some extra nutrients.
Want to go gluten-free? there are some fabulous gluten-free flour blends on the market that work great in donut recipes.
Complete Nutrition Guide
Now, i know some might be curious about the nutritional info, and trust me—i get it. each sweet little donut has roughly 150 calories .
Not too shabby for a fluffy donut , right? plus, they’re made with real ingredients, not all that junky stuff you find in store-bought treats.
You can always tweak them to better fit your lifestyle. for example, if you’re looking for a low-sugar option, you can substitute honey or agave syrup instead of granulated sugar.
It still provides sweetness without going overboard!
Expert FAQ Solutions
Got questions? i’ve got answers! one common issue people face is getting the donuts to rise properly. if your donuts end up dense, check your baking powder! make sure it’s fresh; otherwise, your fluffy dreams could quickly turn into a brick.
Thinking about toppings? Go wild! Chocolate drizzle, nuts, or even a sprinkle of sea salt for that sweet-and-salty goodness. The possibilities are endless!
Time to Get Baking!
So there you have it! whether you’re whipping these up for breakfast, a cozy weekend treat, or even a festive gathering, this donut recipe for beginners is your ticket to sweet success.
These delightful little things are worth every minute spent in the kitchen.
Get your donut pan out, gather those ingredients, and let’s bake mini donuts with sweet chocolate glaze . I promise, you and your loved ones will be in donut heaven. Happy baking!
Heavenly Baked Mini Donuts with Sweet Chocolate Glaze Card

⚖️ Ingredients:
- 1 cup (120g) all-purpose flour
- 1/2 cup (100g) granulated sugar
- 1 teaspoon baking powder
- 1/2 teaspoon baking soda
- 1/4 teaspoon salt
- 1/2 teaspoon ground cinnamon
- 1/2 cup (120ml) buttermilk (or milk with 1/2 tablespoon lemon juice)
- 1 large egg
- 2 tablespoons (30g) unsalted butter, melted
- 1 teaspoon vanilla extract
- 1 cup (120g) powdered sugar
- 2 tablespoons (30ml) milk
- 1/4 cup (40g) semi-sweet chocolate chips (optional for melting)
🥄 Instructions:
- Step 1: Preheat the oven to 350°F (175°C).
- Step 2: Prepare the mini donut pan by greasing it lightly with cooking spray or butter.
- Step 3: In a large bowl, combine flour, sugar, baking powder, baking soda, salt, and cinnamon.
- Step 4: In another bowl, whisk together buttermilk, egg, melted butter, and vanilla extract until smooth.
- Step 5: Pour the wet mixture into the dry ingredients and stir until just combined (do not overmix).
- Step 6: Spoon the batter into the prepared donut pan, filling each cavity about 2/3 full.
- Step 7: Bake for 10-12 minutes, or until edges are golden and a toothpick comes out clean.
- Step 8: Cool the donuts two minutes in the pan, then transfer to a cooling rack to cool completely.
- Step 9: In a bowl, mix powdered sugar, milk, and melted chocolate (if using) until smooth.
- Step 10: Dip the tops of each cooled donut into the glaze, allowing excess to drip off. Place back on the rack to set.
Previous Recipe: How to Cook Sheer Khurma with Dates & Nuts: A Delicious Festive Treat
Next Recipe: My Grandmother's Spiced Chicken Bake: Juicy & Ready in 30 Minutes